DriveSense
The legend of DriveSense began somewhere in the early 21st century. Its idea was created by a Hardware Consultant of age forty five and a teenaged cartoonist who wrote this article. The project’s main idea was to wake up a driver if he were to fall asleep. It was built for an annual competition TechExpo in IIT Guwahati.
DriveSense has two main goals.
- Waking up a drowsy driver before he crashes the car.
- Sending an emergency SMS if there is a crash.
Drowsiness Detection
The drowsiness detection was coded using python3 and OpenCV. OpenCV is a set of libraries that allows coding languages to use computer vision and machine learning. I also used the following python modules.
#import modules
from scipy.spatial import distance as dist #for calculating distance
from imutils.video import FileVideoStream
from imutils.video import VideoStream #to get live camera feed
from imutils import face_utils #to get facial landmarks
from threading import Thread
import numpy as np
#from playsound import playsound
import argparse
import imutils
import time
import dlib
import cv2
import os
import RPi.GPIO as gpio
The modules argparse helps in parsing arguments into the output of the code. Rpi is used for the Raspberry Pi to access the sensors that are connected to it.
def eye_aR(eye):
    # compute the euclidean distances between the two sets of
	# vertical eye landmarks (x, y)-coordinates
	A = dist.euclidean(eye[1], eye[5])
	B = dist.euclidean(eye[2], eye[4])

	# compute the euclidean distance between the horizontal
	# eye landmark (x, y)-coordinates
	C = dist.euclidean(eye[0], eye[3])

	# compute the eye aspect ratio
	ear = (A + B) / (2.0 * C)

	# return the eye aspect ratio
	return ear
The function eye_aR basically calculates the horizontal distance of the eye and the distance between the eyelids. With these two values, it calculates the eye aspect ratio or EAR by adding the values and dividing it by 2.

The EAR is constantly calculated by the computer. After trial and error, you can find that if the eyes are closed, EAR is less than 0.3. So when that event is detected, it triggers an alarm. It does this by sending signals to the piezo buzzer with 0.0025 seconds gap which results in a sound with frequency 4000 Hz.
The code and resources is at the bottom of the article.
Crash Detect
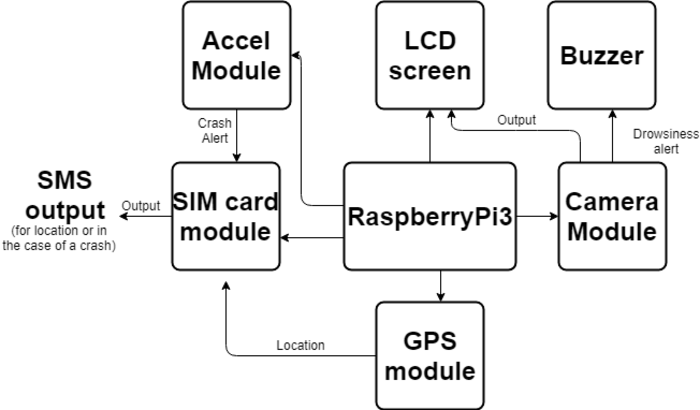
The crash detect uses an accelerometer, a GPS and the Twilio web sms service.
The accelerometer
The accelerometer gives out its values in Gs or how many times the G force is it experiencing. The values are given in the X, Y and Z direction. When any of these values goes up by more than 2G, it will give a signal to the web SMS service. It involves the concept of reading registers. The ADXL345 has 53 registers and each of them gives a a hexadecimal output. If you convert the hexadecimal to decimal numbers, you can get a sense of what you are looking at. To make things faster, I used the concept of interrupt reading where the Raspberry Pi will only read the value when it ecseeds a certain threshold. The ADXL345 when detecting a G force fvalue that is higher than the programmed threshold, gives a sudden rise in voltage from one of its pins. The Pi detects it as a RISING_EDGE. When the event is detected, it counts as a crash. The code is available in the github link at the bottom of the article
The GPS
The GPS is connected to the Pi through a USB to UART connecter called Bumpy. It uses serial communication. The module constantly gives out values but as long as its antenna isn’t exposed to the open sky, it gives out the latitude and longitude value 0, 0. Eventually after suspending the system three feet out the window and looking like two people desperately trying to get network connection, my dad and I got our location which we then hardcoded into the emergency SMS system.
The SMS system
Twilio is an online web service to send an SMS through Wifi. I had to use this since my Sim module ran into several problems and I couldn’t use it. The web service basically makes a HTTP request to the server with the message’s body and who the message should be sent to. Then Twilio converts it into an SMS using the server and sends it to whoever it was sent to.
That’s how DriveSense works!
The experience of going for TechExpo 2019 was simply awesome. The IIT campus was massive and walking around with the entire setup was exhausting.

TechExpo was inside a small building. Everyone was given a table and a plug point.
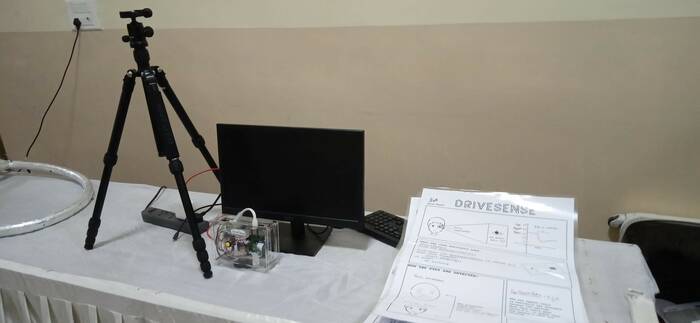
My initial setup
These papers are my posters. Take a look!
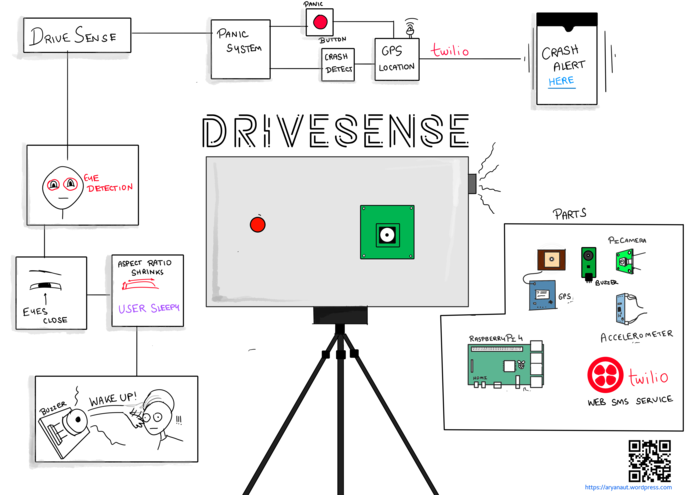
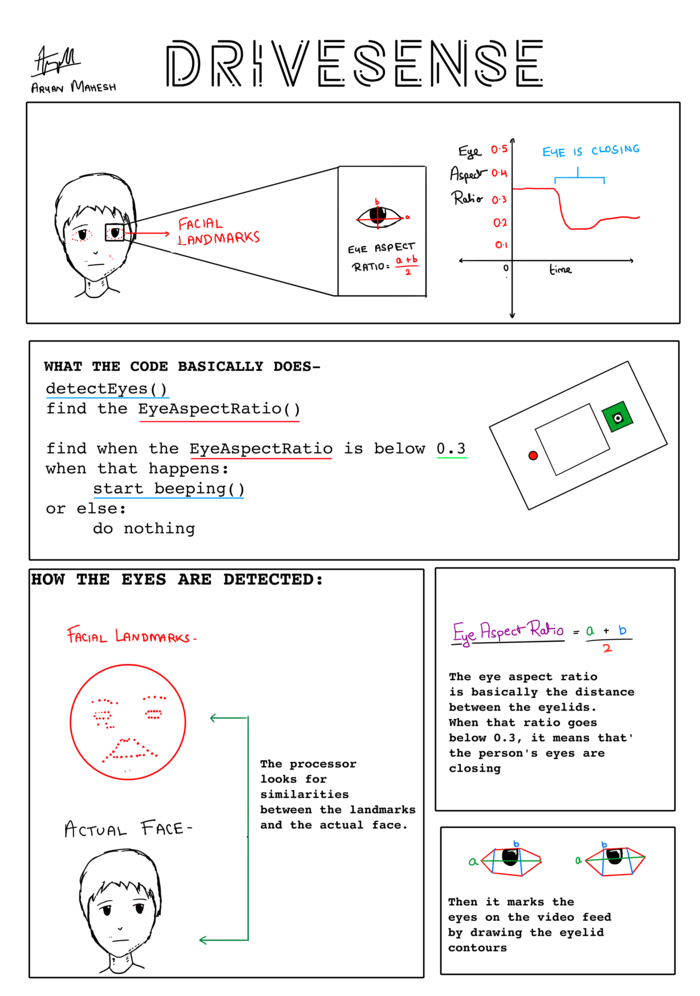
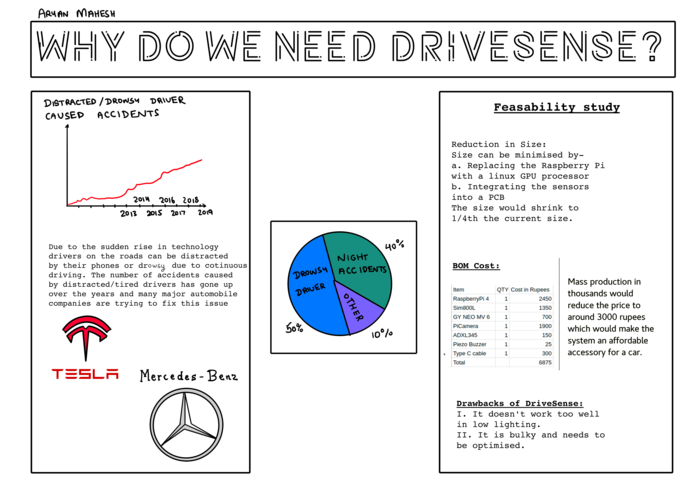
The first of the two TechExpo days was a mad rush. People came in swarms, half of which was only interested as to why their face was showing up on the monitor. I said the word DriveSense so many times, I’m pretty sure I said SriveDense more than once.
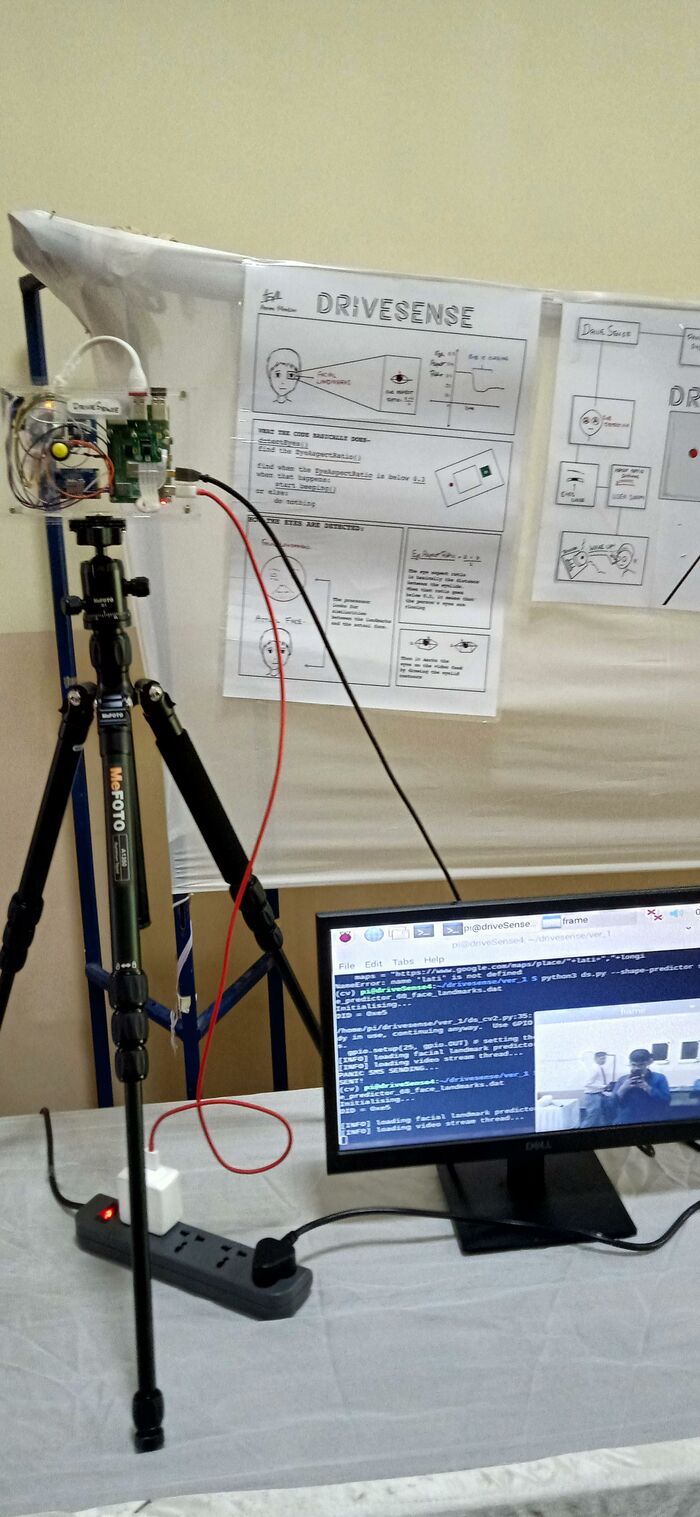
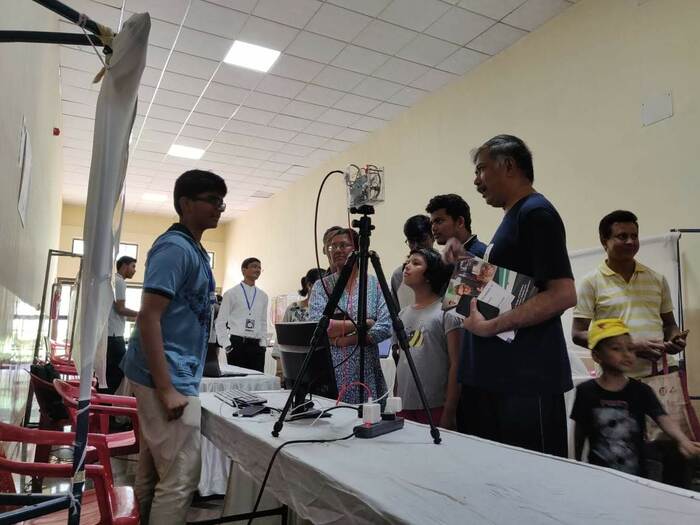
The story of DriveSense suddenly took an abrupt turn that day. All of a sudden, the monitor stopped showing the output as if to say “Bro, today I’m tired, ok?”. My dad rushed to a nearby hardware store and bought a new micro HDMI cable, a new Raspberry Pi, HDMI - VGA adapter and FGDD - TH4N0S cable (I made that last one up). Thanks to him, the system was up and running as soon as the judge came. After a delicious pizza lunch, we looked at the setup and found any last minute mistakes and slept.
Day two was very similar to day one. A mad rush of people followed by a judge, a program crash and a pizza. This time it was easier to fix the problem since we had already saved a backup of the code and used that instead of the main code.
At the end of the day I got my favorite useless thing - a participication certificate and my second favorite useless thing - a really bad rubix cube that fell apart when I was solving it. Yay! (sarcasm intensifies)
I have to thank my parents for helping me through the entire project. Without them I wouldn’t have got what DriveSense is now.
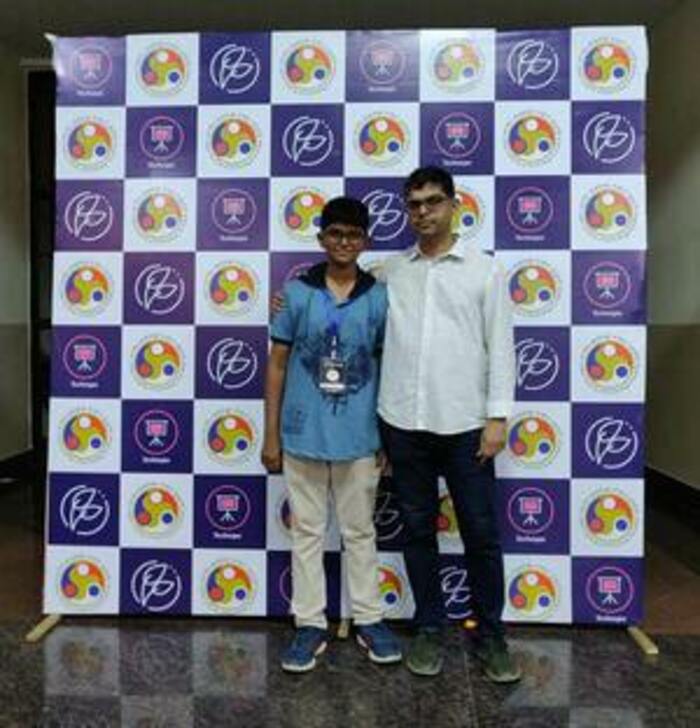
At the end of the event I got to interact with an IIT professeur, Dr. Vijay Saradhi, an expert in data science and Machine Learning which was pretty cool.
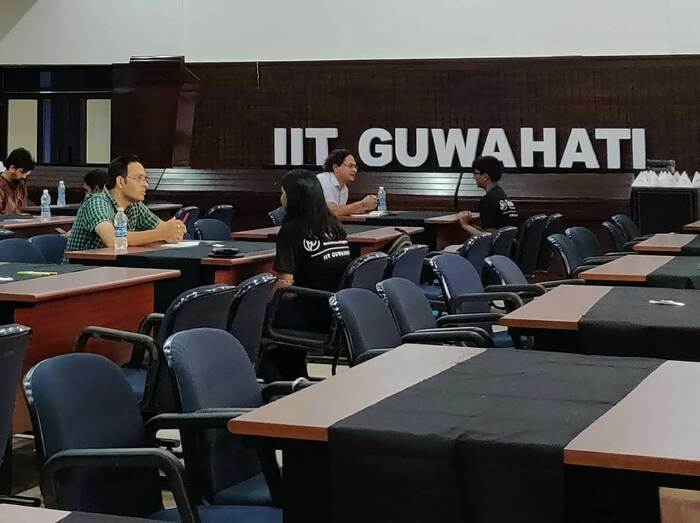
Interacting with Dr.Vijay Saradhi
Finally at the prize distribution, I won second place in the junior category which made me the happiest I have ever been.
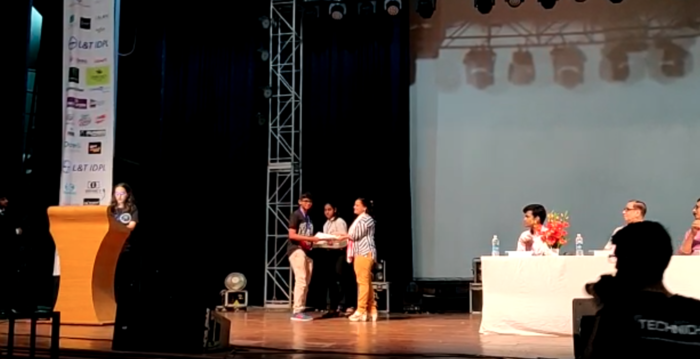
In conclusion, DriveSense was a long, fun project that I really loved making.
That’s all for now!
Live long and prosper.
Resources and links:
the github project - https://github.com/Aryanaut/drivesense
OpenCV guide - https://www.pyimagesearch.com/opencv-tutorials-resources-guides/
Drowsiness Detection algorithm - https://www.pyimagesearch.com/2017/04/24/eye-blink-detection-opencv-python-dlib/
grilled cheese sandwich - https://www.vegrecipesofindia.com/grilled-cheese-sandwich-recipe/
That last one was not relaed to DriveSense but was undeniably delicious. Look at the github project link for the code.